KAN runs with or without Azure. When you configure KAN with Azure, you get additional features like:
- Sending inference results to IoT Hub
- Automatic uploading video snippets to Azure Storage account
- Leveraging Azure Custom Vision models
On the other hand, you can get started with KAN without an Azure account.
-
A Kubernetes cluster.
If you don't have an existing Kubernetes cluster, you can easily create one using the Azure Kubernetes Service (AKS). For more information, visit Quickstart: Deploy an Azure Kubernetes Service (AKS) cluster using the Azure Portal. Make sure to choose Standard DS3 v2 for the node size.
-
A Bash Shell, such as WSL, Azure Cloud CLI, or a Terminal on Mac.
-
Helm v3.8 or higher.
To run with Azure, in addition to above items, you’ll also need:
- An active Azure subscription with Owner role access.
KAN installer script will guide you through the steps of creating related Azure resources (see more details below).
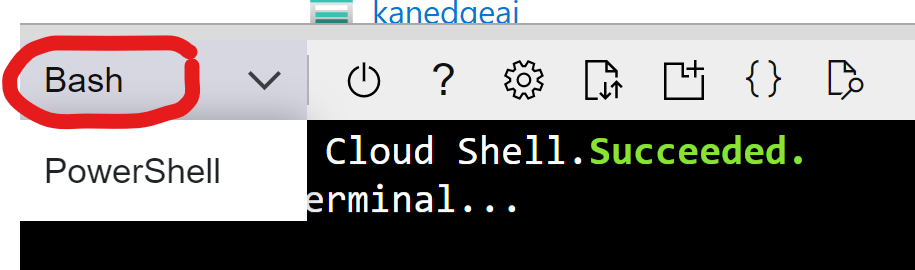
- Open your shell terminal (Azure Cloud Shell recommended). Ensure that you switch to Bash option in Azure Cloud Shell
- Download and launch the installer script:
bash <(wget -qO- https://raw.githubusercontent.com/Azure/KAN/main/Installer/kan-installer.sh) - The first question the script asks is if you want to run KAN with or without Azure. Enter
yto deploy KAN with Azure, otherwise entern.azure user?(y/n):NOTE: Later, you can run the installer script again to choose a different route.
-
Next, you can choose to configure KAN on an existing AKS cluster, or to use your current Kubernetes context, which can point to any local or remote Kubernetes clusters.
Would you like to use a exists aks, or use current kubeconfig?
1) use an existing one
2) use current kubeconfig
Your answer:
If your chose
1, the script lists out all your AKS clusters, and you can select the cluster by entering the cluster index. If you chose2, the script continues with your current Kubernetes context. -
Next, you have options to create a new Azure Storage Account, use an existing one, or skip the step:
Would you like to create a new storage account, or use an existing one? 1) create a new one 2) use an existing one 3) skip 4) back to previous step Your answer:NOTE: You won't be able to view camera snapshots or uploaded video clips without an Azure Storage Account.
If you chose either
1or2, you then need to choose whether you want to create new storage container, or use an existing one.Would you like to create a new blob container, or use an existing one? In order to perform this operation please make sure you have a Storage contributor role on your subscription 1) create a new one 2) use an existing one 3) back to previous step Your answer: -
Next, you can choose which Azure Cognitive Services account to use, or to create a new one:
Would you like to create a new cognitive services, or use an existing one? 1) create a new one 2) use an existing one 3) skip 4) back to previous step -
The next step is to choose an Azure Service Principal to use. We recommend creating a new one with the script in your initial setup, and reuse the same principal in subsequent script runs. Also, if you work with an Azure AD tenant with many service principals, we recommend choosing
3instead of2as enumerating all service principals may take a long time.Would you like to create a new service principal, or use an existing one? 1) create a new one 2) use an existing one 3) use an existing one by entering name 4) skip 5) back to previous step -
Once you've made all selections, answer
yto confirm. And the script will setup all required Azure resources for you.your selections: aks: Use current kubeconfig service_principal: kan-sp storage account: byom/byom storage account location: blob container: clips cognitive services: byom/vision cognitive services location: Are you sure (y or n)? -
After all resources are configured and KAN installed, the script displays your portal URL. Open the URL with a browser and you are ready to go!
- Scripts asks you to confirm to install KAN to the Kubernetes cluster configured as your current cluster. Answer
yto continue.kan will install on current kubeconfig: (y/n)
- Answer
yto confirm installation:your selections: aks: Use current kubeconfig service_principal: skip storage account: skip storage account location: skip blob container: skip cognitive services: skip cognitive services location: skip Are you sure (y or n)? - After all resources are configured and KAN installed, the script displays your portal URL. Open the URL with a browser and you are ready to go!
Now that you have successfully setup KAN experience onto your Kubernetes environment, we recommend first securing your portal.
You can uninstall KAN using Helm:
helm uninstall kanportal
helm uninstall kanReport any issues or bugs you face using the repository's issues page.