Props are arguments passed into React components.
Props are passed to components via HTML attributes.
React Props are like function arguments in JavaScript and attributes in HTML.
To send props into a component, use the same syntax as HTML attributes:
Add a "brand" attribute to the Car element:
const myelement = <Car brand="Ford" />;
The component receives the argument as a props object:
Use the brand attribute in the component:
class Car extends React.Component {
  render() {
    return <h2>I am a {this.props.brand}!</h2>;
  }
}
Props are also how you pass data from one component to another, as parameters.
Send the "brand" property from the Garage component to the Car component:
class Car extends React.Component {
  render() {
    return <h2>I am a {this.props.brand}!</h2>;
  }
}

class Garage extends React.Component {
  render() {
    return (
      <div>
      <h1>Who lives in my garage?</h1>
      <Car brand="Ford" />
      </div>
    );
  }
}

ReactDOM.render(<Garage />, document.getElementById('root'));
If you have a variable to send, and not a string as in the example above, you just put the variable name inside curly brackets:
Create a variable named "carname" and send it to the Car component:
class Car extends React.Component {
  render() {
    return <h2>I am a {this.props.brand}!</h2>;
  }
}

class Garage extends React.Component {
  render() {
    const carname = "Ford";
    return (
      <div>
      <h1>Who lives in my garage?</h1>
      <Car brand={carname} />
      </div>
    );
  }
}

ReactDOM.render(<Garage />, document.getElementById('root'));
Or if it was an object:
Create an object named "carinfo" and send it to the Car component:
class Car extends React.Component {
  render() {
    return <h2>I am a {this.props.brand.model}!</h2>;
  }
}

class Garage extends React.Component {
  render() {
    const carinfo = {name: "Ford", model: "Mustang"};
    return (
      <div>
      <h1>Who lives in my garage?</h1>
      <Car brand={carinfo} />
      </div>
    );
  }
}

ReactDOM.render(<Garage />, document.getElementById('root'));
If your component has a constructor function, the props should always be passed to the constructor and also to the React.Component via the super() method.
class Car extends React.Component {
  constructor(props) {
    super(props);
  }
  render() {
    return <h2>I am a {this.props.model}!</h2>;
  }
}

ReactDOM.render(<Car model="Mustang"/>, document.getElementById('root'));
Note: React Props are read-only! You will get an error if you try to change their value.
We are going to add a login page to our React.js app. To create the login form we are using the FormGroup and FormControl React-Bootstrap components.
Let’s create a page where the users of our app can login with their credentials. When we created our User Pool we asked it to allow a user to sign in and sign up with their email as their username. We’ll be touching on this further when we create the signup form.
So let’s start by creating the basic form that’ll take the user’s email (as their username) and password.

src/containers/Login.js and add the following.
import React, { useState } from "react";
import Form from "react-bootstrap/Form";
import Button from "react-bootstrap/Button";
import "./Login.css";

export default function Login() {
  const [email, setEmail] = useState("");
  const [password, setPassword] = useState("");

  function validateForm() {
    return email.length > 0 && password.length > 0;
  }

  function handleSubmit(event) {
    event.preventDefault();
  }

  return (
    <div className="Login">
      <Form onSubmit={handleSubmit}>
        <Form.Group size="lg" controlId="email">
          <Form.Label>Email</Form.Label>
          <Form.Control
            autoFocus
            type="email"
            value={email}
            onChange={(e) => setEmail(e.target.value)}
          />
        </Form.Group>
        <Form.Group size="lg" controlId="password">
          <Form.Label>Password</Form.Label>
          <Form.Control
            type="password"
            value={password}
            onChange={(e) => setPassword(e.target.value)}
          />
        </Form.Group>
        <Button block size="lg" type="submit" disabled={!validateForm()}>
          Login
        </Button>
      </Form>
    </div>
  );
}
We are introducing a couple of new concepts in this.
-
Right at the top of our component, we are using the useState hook to store what the user enters in the form. The
useStatehook just gives you the current value of the variable you want to store in the state and a function to set the new value. If you are transitioning from Class components to using React Hooks, we’ve added a chapter to help you understand how Hooks work. -
We then connect the state to our two fields in the form using the
setEmailandsetPasswordfunctions to store what the user types in —e.target.value. Once we set the new state, our component gets re-rendered. The variablesemailandpasswordnow have the new values. -
We are setting the form controls to show the value of our two state variables
emailandpassword. In React, this pattern of displaying the current form value as a state variable and setting the new one when a user types something, is called a Controlled Component. -
We are setting the
autoFocusflag for our email field, so that when our form loads, it sets focus to this field. -
We also link up our submit button with our state by using a validate function called
validateForm. This simply checks if our fields are non-empty, but can easily do something more complicated. -
Finally, we trigger our callback
handleSubmitwhen the form is submitted. For now we are simply suppressing the browser’s default behavior on submit but we’ll do more here later.
src/containers/Login.css.
@media all and (min-width: 480px) {
  .Login {
    padding: 60px 0;
  }

  .Login form {
    margin: 0 auto;
    max-width: 320px;
  }
}
These styles roughly target any non-mobile screen sizes.
src/Routes.js below our home <Route>.
<Route exact path="/login">
  <Login />
</Route>
import Login from "./containers/Login";
Now if we switch to our browser and navigate to the login page we should see our newly created form.
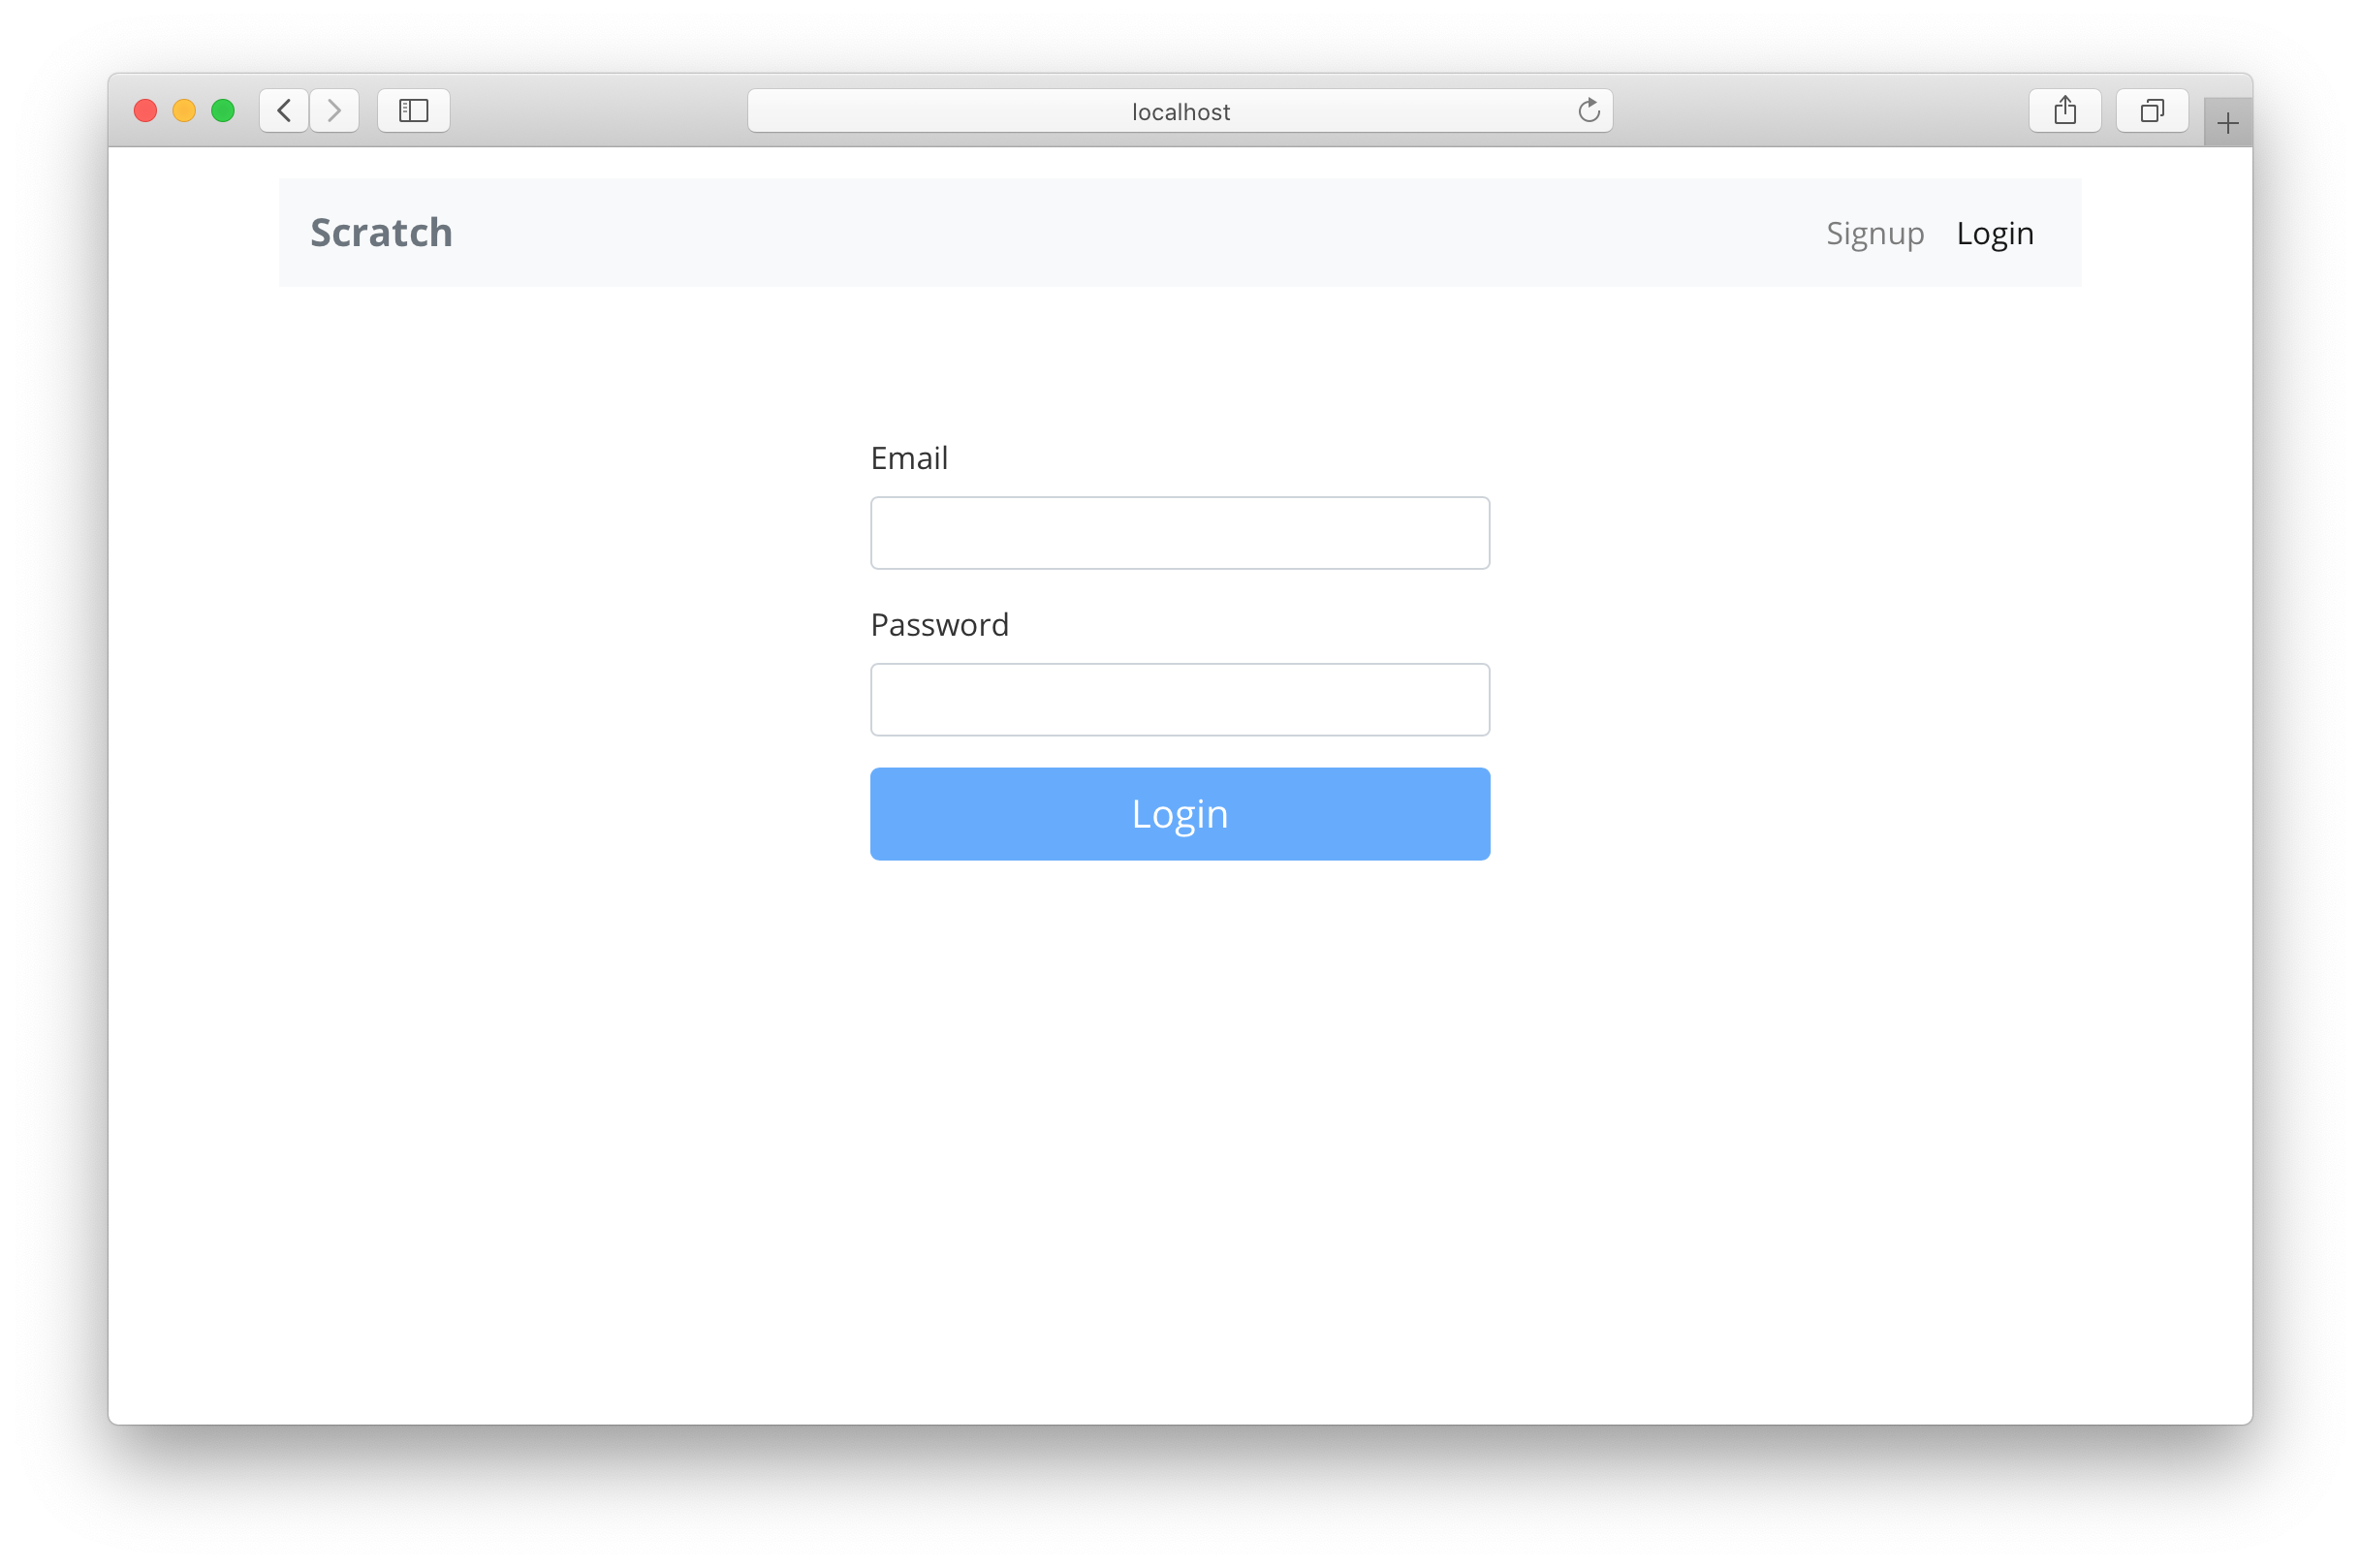
Next, let’s connect our login form to our AWS Cognito set up.
So today I would like to cover how you can create login forms in react.js using hooks and bootstrap from scratch. In the end, you will…

So today I would like to cover how you can create login forms in react.js using hooks and bootstrap from scratch. In the end, you will have a UI like this one below:
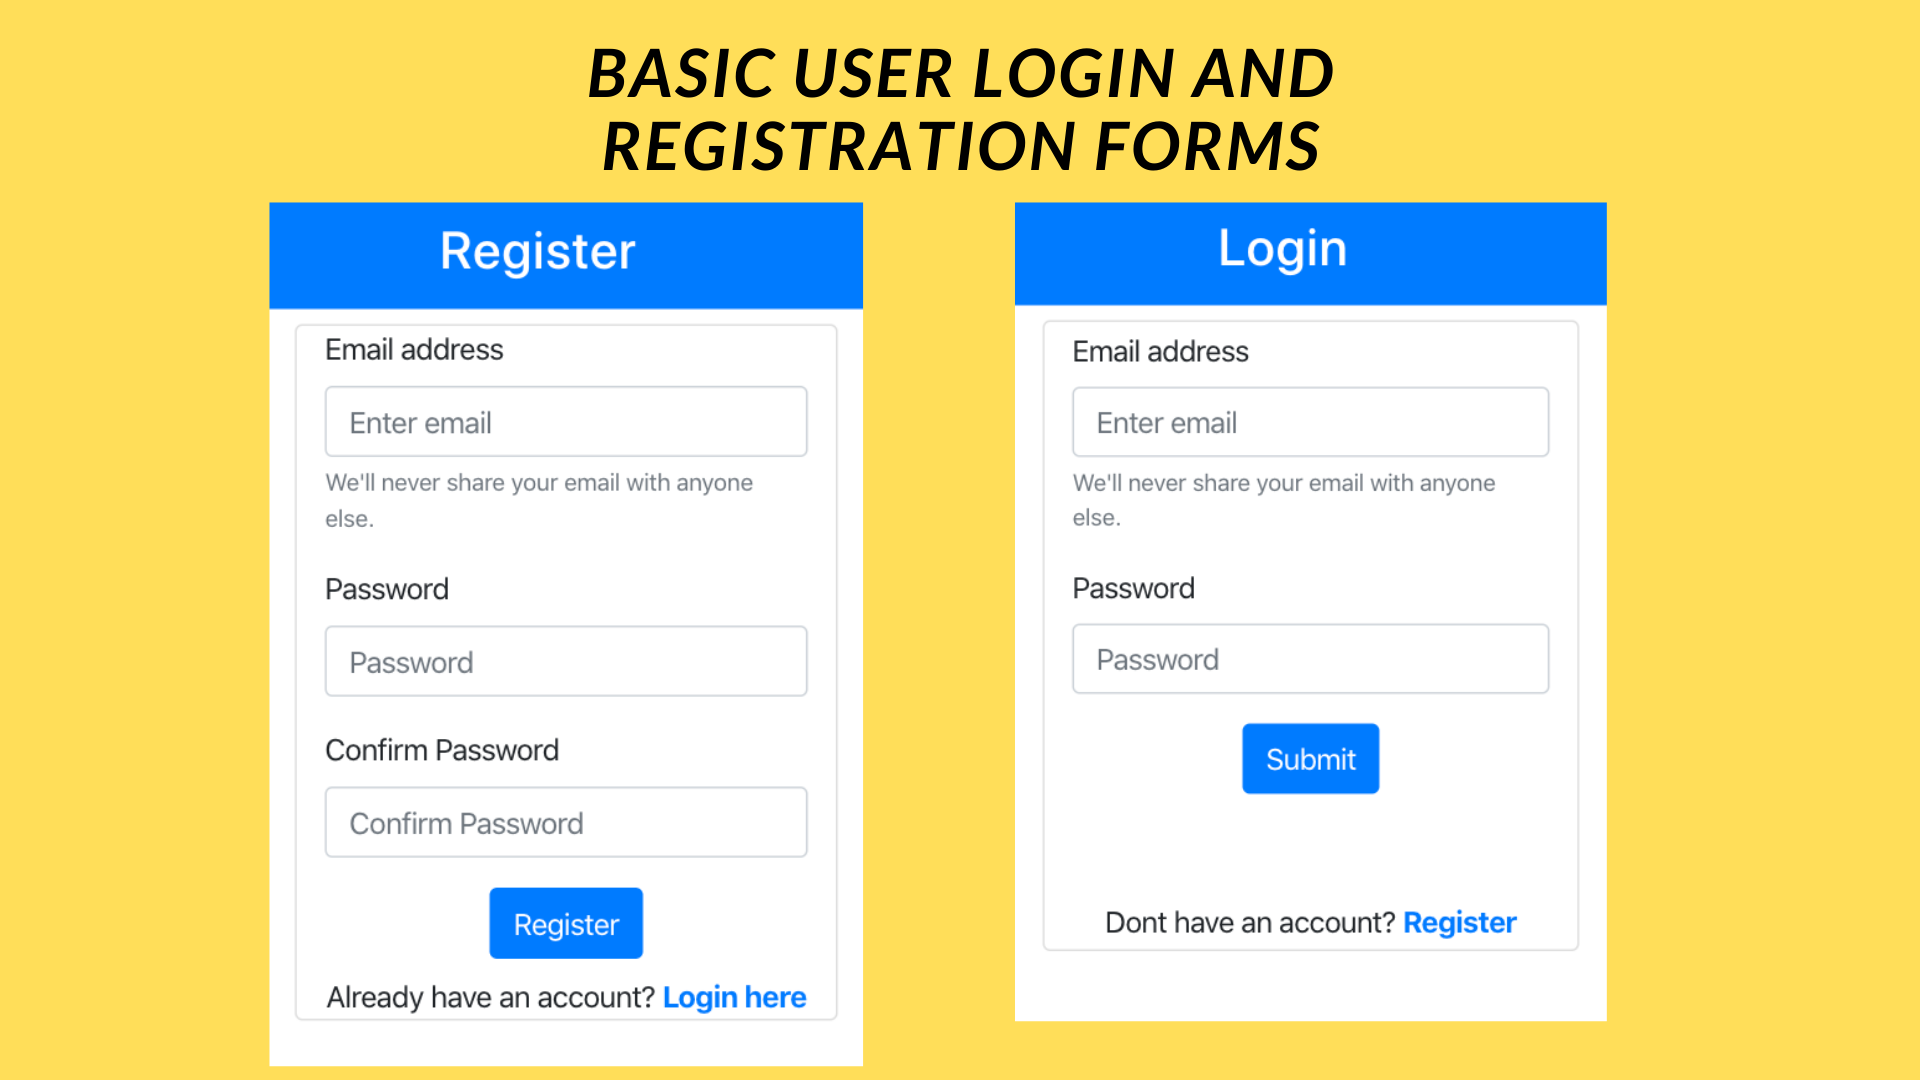
User login and registration forms
So let’s begin the journey…
Some prerequisites for the project are that you need to have node.js and an editor like Vscode installed on your system. Optionally you can also install the yarn package manager. Now the first thing we need to do set up a new react.js project, so open up your cmd/terminal and run the below commands to create a new project using the create-react-app module and start your project:-
npx create-react-app loginforms
cd loginforms
npm start
If everything goes well you should get the below screen:-


Default react.js app screen
Now open the loginforms folder in vscode and you will find mainly two folders viz src and public. Open index.html in the public folder and make the following edits:-
First, change the text within title and meta tags as per your requirements:-
Title and meta tag changes for index.html
We are going to use bootstrap 4 in our project so head over to there official docs page here and add CSS and js links from the page to index.html as follows:-
Bootstrap changes in index.html
The complete file after all these changes will look like the one below:
Now let’s create a basic folder structure for our project so that all files are organized properly:-

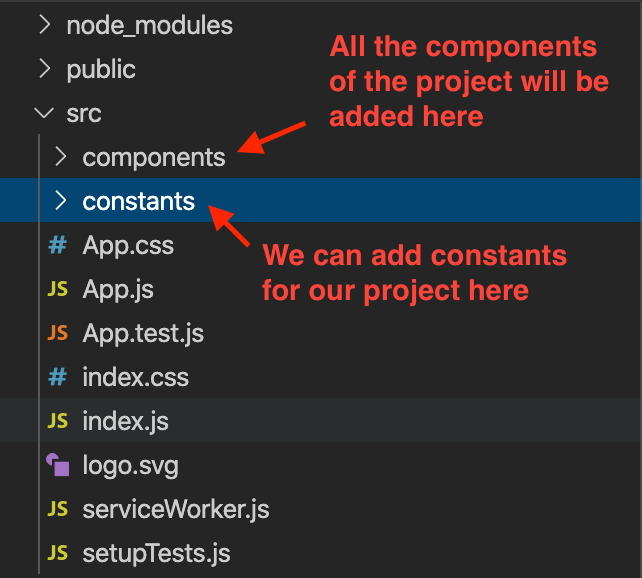
The file structure of the project
We are adding a components and constants folders within src folder. The components folder will contain all the related components of the project. First, let us add a header component at the top of the page.
For that create a folder named Header in components folder and then create a file called Header.js within that folder.


Header.js file added in Header folder
We are to going use bootstrap’s navbar component for creating our header. The code for the header component is as follows:-
Header.js file
Now let’s import the Header component in App.js file and modify App.js as follows:
If the code changes are correct you will be able to see the header in the webpage as shown below:-
Page header
Next, let us add the registration form for the users. Create a RegistrationForm folder in components and add the below code to create user inputs with labels:-
We have added input for email on line no 8 and password inputs on 18 and 26. This will show inputs on-screen however we haven’t added a way to manage and store the value of text entered by user or action on submit button click so next let’s see how we can do that…
So if you haven’t used hooks before here’s a brief introduction to react.js useState hook:-
“State variables are variables whose values can be dynamically updated in react.js context and we can use them to update various UI elements. useState hook provides a way to declare and update state variables in various react.js functional components.”
Let’s see an example of how theuseState hook can be used to handle values entered by the user in email and password input:-
useState hook typically returns two parameters viz the state variables and a function to update the state variables
In the above example, we initialized email and password state values using useState hook on line no 3. The state object will contain the email and password values while the setState method is responsible for updating these values.
We passed this state variable values in the value field of inputs in line no 22 and 30 and the responsibility for updating the values lies with the handleChange function. We can make similar changes to confirmPassword input field
Next, we need to send these details to backend server. This will be handled in on click on submit button so let’s add a click event handler to register button for sending a request to backend:-
handleSubimitclick implementation
So we first define handleSubmitClick function where we check if the password inputs match and call sendDetailsToServer function to make a backend API request else we will show an error to user that passwords do not match.
axios is an npm module that is used to make API requests to the backend. You can find more information about it here. Let’s add it to our project before proceeding further. First go back to terminal/cmd and make sure in the project directory. Run the below command to add axios npm module:-
npm install --save axios
Now let’s go back to defining our sendDetailsToServer function:-
You will need to create and set up a backend server for handling API requests. You can check out an excellent article on creating them using Node.js and MongoDB here:- Backend set up article. Just keep one thing in mind that we are not using username field in frontend so if you are following above tutorial then do take care to remove the same. You can find a repo related to these changes here: Github.
We are making a post request to the server where API_BASE_URL is defined in the constants file.
The complete code of RegistrationForm.js file can be found here:-
Next we will set-up react-router for displaying login and register pages at two different address paths. First, install react-router-dom npm module by entering the below command in cmd/terminal:-
npm install react-router-dom
Next set up react-router in App.js file of the project:-
Now if we run npm start command, then we should see the registration form in the home page route.
Next, we create a login form by following almost a similar procedure and we can add a redirect link below both the forms to switch between login and registration. Finally, on receiving a success response from the server we can redirect the user to the home page.
All these different routes need to be added in App.js file. We have also included a small AlertComponent to show errors while handling user inputs:-
If you look at line no 3 you will find a props parameter passed in the component. props are values passed from the parent component to the child component. We can make use of props to update the component state based on changes in the parent component.
Here we have made use of another react.js hook called useEffect on line no 12. It is useful for updating component level state variables based on changes in props received from the parent component. Basically it listens for changes in prop values and then executes code written within it based on those changes.
You can find the complete source code for this project till this point on the Github repo:- Codeclasifiers loginforms
Feel free to check it out for reference, fork it and submit your own modifications via PRs anytime.
Now I haven’t covered storing session cookie/token from the backend or created private authentication based routes in this tutorial mainly because I wanted to focus on UI and concept of react.js hooks. This means the homepage route is accessible even without login which defeats the purpose of having user authentication.
In the second part, we will see how to store access token received from backend APIs locally and how to make the home route private. Check out the article here:
Part 2: Creating private routes and handling session in react.js
Bonus tips:-
Input Icons
You can add icons before input forms to make UI of the forms more appealing to the user.
Session Management
You need to manage client level sessions for the user in case of showing private routes. Do research about it a bit on the react-router site and try to create some of your own or check out the second article in this series to learn more: Article on the private routes.
Independent writers like me from India can’t earn from Medium’s Partner Program since Stripe is not available fully available in India yet. If you found my content useful then consider supporting me on Kofi