Data science comprises of:
- Data - which needs storage
- Science - Statistics and programming, to take inputs, make visualizations, and apply math functions
- Hardware and processing power : big enough to work on big data
- Domain knowledge and a problem to solve.
There are several languages and libraries that can be used to program and solve data science problems. In this case, we choose R.
What's good about R?
- R was written by statisticians and is preferred by statisticians.
- R has functional procedures. Strong concise, computationally efficient ways to work with data and statistics.
- There's a community and resources to help learn and grow.
- There are IDE's available
- It is free, easy to use and open source
- Takes vectors as inputs
- Libraries for data science are more updated and large compared to it's competitors
- Multithreading and Asynchronous functions
Some concerns around R:
- R was originally written for running from a stand-alone system
- To solve computationally intensive, or huge data sets, one might have to learn syntax and use the enterprise version like Microsoft R which is not free to be used in production environments.
Python as an alternate :
- Python does more than data science and programmers are familiar with the syntax.
- It also has strong functions for data munging, but might not be as strong in single line statistical functions or a library as extensive as R. It is quickly matching up to R.
- Python is considered more readable.
Scala as an alternate: Scala is also argued to be better than Python in some aspects, especially in conjunction with Spark.
The general thought though is to be aware of and ready to use the tool/language best fit for a problem.
For this setup, we go with R.
It's possible to use R Studio , an IDE to work for R. But Jupyter notebook has become the preferred way to work with R, Python and a pleothora of other languages. Why?
- It's readable, where code, results, images, documentation can all be grouped in one place.
- It can be shared and executed line by line on a browser through a neat interactive programming UI.
- It can be used as a template, that can be easily modified and debugged.
Yes but no.
It is possible to install Jupyter on bash on your local computer and get started. But this has two main disadvantages:
- First, you could get started and find out that your hardware resources are not enough, or your system requirements need to be changed.
- Second, installation is a pain. You might need new packages and they might have conflicting dependencies, or multiple dependencies, or need regular updates.
- Another disadvantage could be moving across systems and having to repeat the installation process, maintaining configuration files.
AWS is a service where you can abstract your system and hardware requirements to an external computer or server and use your computer as a dumb terminal that sends and receives signals to the external system through the service.
There are a few reasons why AWS plays well in this situation.
- System / Memory constraints, but It might be possible to be programatically efficient to work around hardware constraints.
- Ease of spinning systems , expanding servers brings flexibility.
- But the more important reason could just be Docker, because Docker works better on Linux than on Windows. 'Why Docker?' will be visited shortly.
Our local system can be connected to AWS securely through SSH. SSH is a secure way to connect two shells through an unprotected network. A public key is used to connect through the internet to a component on the network. The private key is kept secret, never shared, but can be locally matched to a public key to identify the system is allowed to acces this SSH connection.
To generate SSH, one must first use the terminal and open the bash shell. In Windows, git bash maybe used instead of the terminal used in Mac.
keygen-ssh
generates a token. The default method of creating a key is rsa, although there are other options.
There might be cases in which one might need two separate public keys. The first key maybe generated using:
ssh-keygen -t rsa
The second can be created using the command
ssh-keygen -t rsa -f ~/.ssh/newname.pub
Once a key is created locally, the public key needs to be updated on AWS to connect securely to AWS. To do so, we login to the AWS account , open an EC2 instance , click on 'Key Pairs' on the left tab and paste the public key file's contents here and give a name to this pair.
This sets up what's needed to connect a local to AWS.
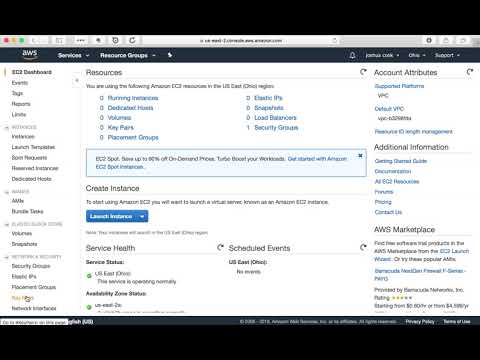
Amazon Elastic Compute Cloud (Amazon EC2) is a web service that provides secure, resizable compute capacity in the cloud. It is designed to make web-scale cloud computing easier for developers. This is essentially what replaces our local system.
To create an EC2 instance, we click 'Instances' on the left tab and first choose an AMI or image. We choose Ubuntu because Docker works well on Ubuntu. We could choose a windows OS as well, but it reduces one of the benefits of Docker by forcing a linux OS(base OS) on top of the windows OS(Host OS) within AWS. Once that is done, an instance is picked based on the memory and storage requirements. Micro instances are the most economic ones. A VPC maybe configured to create a subnet that would allow sharing access to the EC2 from a private network.
Security groups are used to configure the ports that need to be opened in order to talk to the different apps installed on AWS EC2.
Once all these details are given, we can launch this instance, at which point we confirm the name of the key pair we created to let us connect from the local.
This would give us a public IP address and a private address.
Once the EC2 is setup and we are ready to connect to AWS from our local, we would get back on our bash terminal, and use the following command:
ssh username@ip
- username from the AMI, public IP from EC2
In case of two public keys, to use specific key:
ssh username@ip -i ~/.ssh/newpath
One of the problems in installing Jupyter R is the installation process, and how each package that needs to be installed has many dependencies that work differently on different systems. This means running a lot of commands, waiting for installation, updates etc. It is time consuming, requires debugging configuration files, and is not a standard repeatable process.
Which is why we don't install Jupyter right on our laptop, or on Ubuntu(AWS), for that matter. Docker helps with this installation process, by making it standard , repeatable and quick.
Docker is a way of placing an application along with it's dependencies in a container, so when we install the docker version of an application, we install the container, which has both the app and it's dependencies already set up.
It is also light-weight, only packaging the essentials for the app as opposed to a virtual machine, which is heavy. When running a ps command on Docker VS on a VM, this becomes evident.
Docker works better on Ubuntu as it is directly able to use Linux kernel processes that are needed by the application. With a Windows OS however, Docker needs to first install a Debian version of the OS onto Docker.
Downloading install script from docker and piping to shell
Curl -sSL https://get.docker.com | sh
There are some security questions raised while doing this, but we are comfortable doing this
Sudo usermod -aG docker ubuntu
Ctrl D - same as exit
Reconnect/SSH to AWS
Docker -v
The Jupyter community is a mix of people from industry, Continnum Analytics and UC Berkeley who maintain a stable docker version of Jupyter, so as to make our life easy.
Using Docker Compose This link shows a way to put all the commands below in one file to run. But in order to understand , and tweak as needed, we will run the commands one by one.
Docker pull jupyter/datascience-notebook
Docker run -v /home/ubuntu:/home/jovyan -p 80:8888 -d jupyter/datascience-notebook
-d means run in the background
-v attaching docker-user to hostOS-user
-p port on the Host OS is connected to the port on Docker
Usually this is 8888:8888, but when in restricted networks that don't allow certain ports to be used, we work with what we have This gives you a container ID which is used to refer it in any further commands on the container
Docker exec 304e jupyter notebook list
304e - first four letters of the container ID - executing Jupyter notebook on the container.
ps
images
tags
logs
stop
rm
stats
prune
scp
Docker Hub : Git Hub is for code, Docker hub is for docker images Docker Compose : To work across containers Kubernetes : To automatically expand or remove running images as demanded by need.
Output from the exec command can be used to connect to Jupyter. 'Localhost' is replaced with the public IP address of the EC2 instance when accessing the notebook from the browser.
Currently running servers:
http://localhost:8888/?token=683b7579942d4454de4ac16bb09f53d51c605558d171011f :: /home/jovyan
Schema: 
A detailed budget of the costs of running a Jupyter Data Science Notebook Server for three months using at least three different kinds of EC 2 instances.
BUDGET: 