THIS PROJECTS IS A FORK FROM: Ragnar Engine. AUTORS:Lucas Pérez. and Oriol Bernal.
Welcome to the HiveMind Engine webpage, here, we will tell you all the things you should know about our little engine which we made with all our love and passion for the subject "videogame engines" at CITM university. For this subject, we had our skills tested at our maximum level as we had to pour everything we learnt on our career about programming and create a functional engine that people could use to create videogames. This has been a big challenge but we are proud to announce that our engine has been finished and is fully functional! We have been tasked with the making of the shaders components and you can test it by yourself! But before telling you how to do such things, let's present the team.
Our fantastic team is compound by:
-
Mario Hernandez (Code & Debugging)
-
Oriol Valverde (Code & Debugging)
-
Marc Ruiz (Code & Production)
- WASD to move the camera in X's axis and Z's axis.
- RightClick to rotate the main camera.
- LeftClick to select.
- Pressing “f” should focus the camera around the geometry.
- Holding SHIFT duplicates movement speed.
- Mouse wheel should zoom in and out
- Right Click to delete the GameObject in hierarchy
- In our engine, you can create base forme as a cube, pyramid, sphere or cylinder. But if you want to use your own files, you can drag and drop them to your project.
- To drag and drop a texture, first select the ojects in hierarchie and then drop the file.
- You can transform position, rotation and scale your object with the inspector window.
- We have a "Game" mode, which can be activated with the "Game State" button.
- Activating this mode changes the colour of the interface to give visual feedback.
- If you change elements while "Game State" is activated, they will return to their initial position when deactivated.
- All meshes use AABB and can be discarded using Frustrum culling Game mode when activated.
- We can select an object in the "Scene" window by LeftClick on it.
- The editor has 2 windows one with the scene(editor view) and another captured from a gameobject with a camera component(main game camera), each one has its own framebuffer and the user can visualize both at the same time.
- We can look at the project files from the same engine, create new folders and delete them.
- We have the "library" folder where the metadata is stored.
- The camera object has a guizmo for the frustrum.
- The engine uses a shader pipeline to draw geometry.
- Editing a shader in-engine automatically compiles and applies the changes.
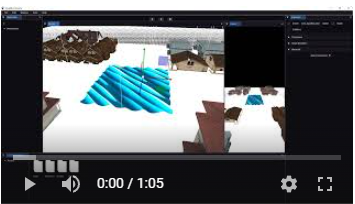
- Plane with shaders in the middle of the scene that simulates water.
- Uniforms values can be edited from the inspector.
- Compile error lines and messages are shown in the console.
- Drag and drop creates an error the first time you drop a file but if you omit it and try it again, works properly.
In this subject, the main goal was to create a videogame engine that could execute basic functions of the videogame you are making on it, but it had a lot of sub-systems that were not implemented, as every group on our class had to make one of this sub-systems. On our case, we had to do the shaders system, which includes:
- Apply a shader to a mesh.
- Edit a shader in-engine to modify it.
- Use pre-existing shaders.
- Play with our sub-system to know more about it!
Our shaders options are the following:

- ka, kd, ks: Change the contrast of the wave.
- directionA, directionB, directionC: Changes the direction of the waves
- shininess: Changes the brightness of the waves.
- stepnesssA, steepnessB, steepnessC: Changes the height and rhythm of the waves.
- wavelenghtA, wavelenghtB, wavelenghtC: Changes the position of the waves.
- Edit Shader: You can change the values or the shaders itself entering to the code version of the shader from this menu.

Click on the image to watch it
https://github.com/Makinilla-maker/Engine3D
This project is licensed under an unmodified MIT license, which is an OSI-certified license that allows static linking with closed source software. Check LICENSE for further details.
We have fork the teacher's project at the day of 9/11 for future usage.
For v0.2 we have used a fork of this project