Developed by Ranasurya Ghosh
A robotics experimentation framework that transforms PyBullet robots into intuitive Python objects, with modern ImGui-based controls, telemetry, visualization, and reinforcement learning workflows.
Install BulletLab library: pip install bulletlab
Read Documentation
BulletLab provides a high-level object-oriented interface to PyBullet that simplifies robotics experimentation by exposing joints, links, sensors, and environments as intuitive Python objects instead of raw physics engine IDs. It combines real-time simulation with a ImGui-powered modern interface for interactive control, parameter tuning, telemetry visualization, and experiment management, while also offering reinforcement learning integration for training and evaluating autonomous robotic systems within a unified workflow.
Instead of this:
p.setJointMotorControl2(
    robot_id, joint_index,
    controlMode=p.VELOCITY_CONTROL,
    targetVelocity=15,
    force=100
)
You write this:
robot.joints["motor"].velocity = 15BulletLab uses a two-window architecture:
| Window | Purpose |
|---|---|
| PyBullet Native Window | Physics simulation, 3D rendering, camera |
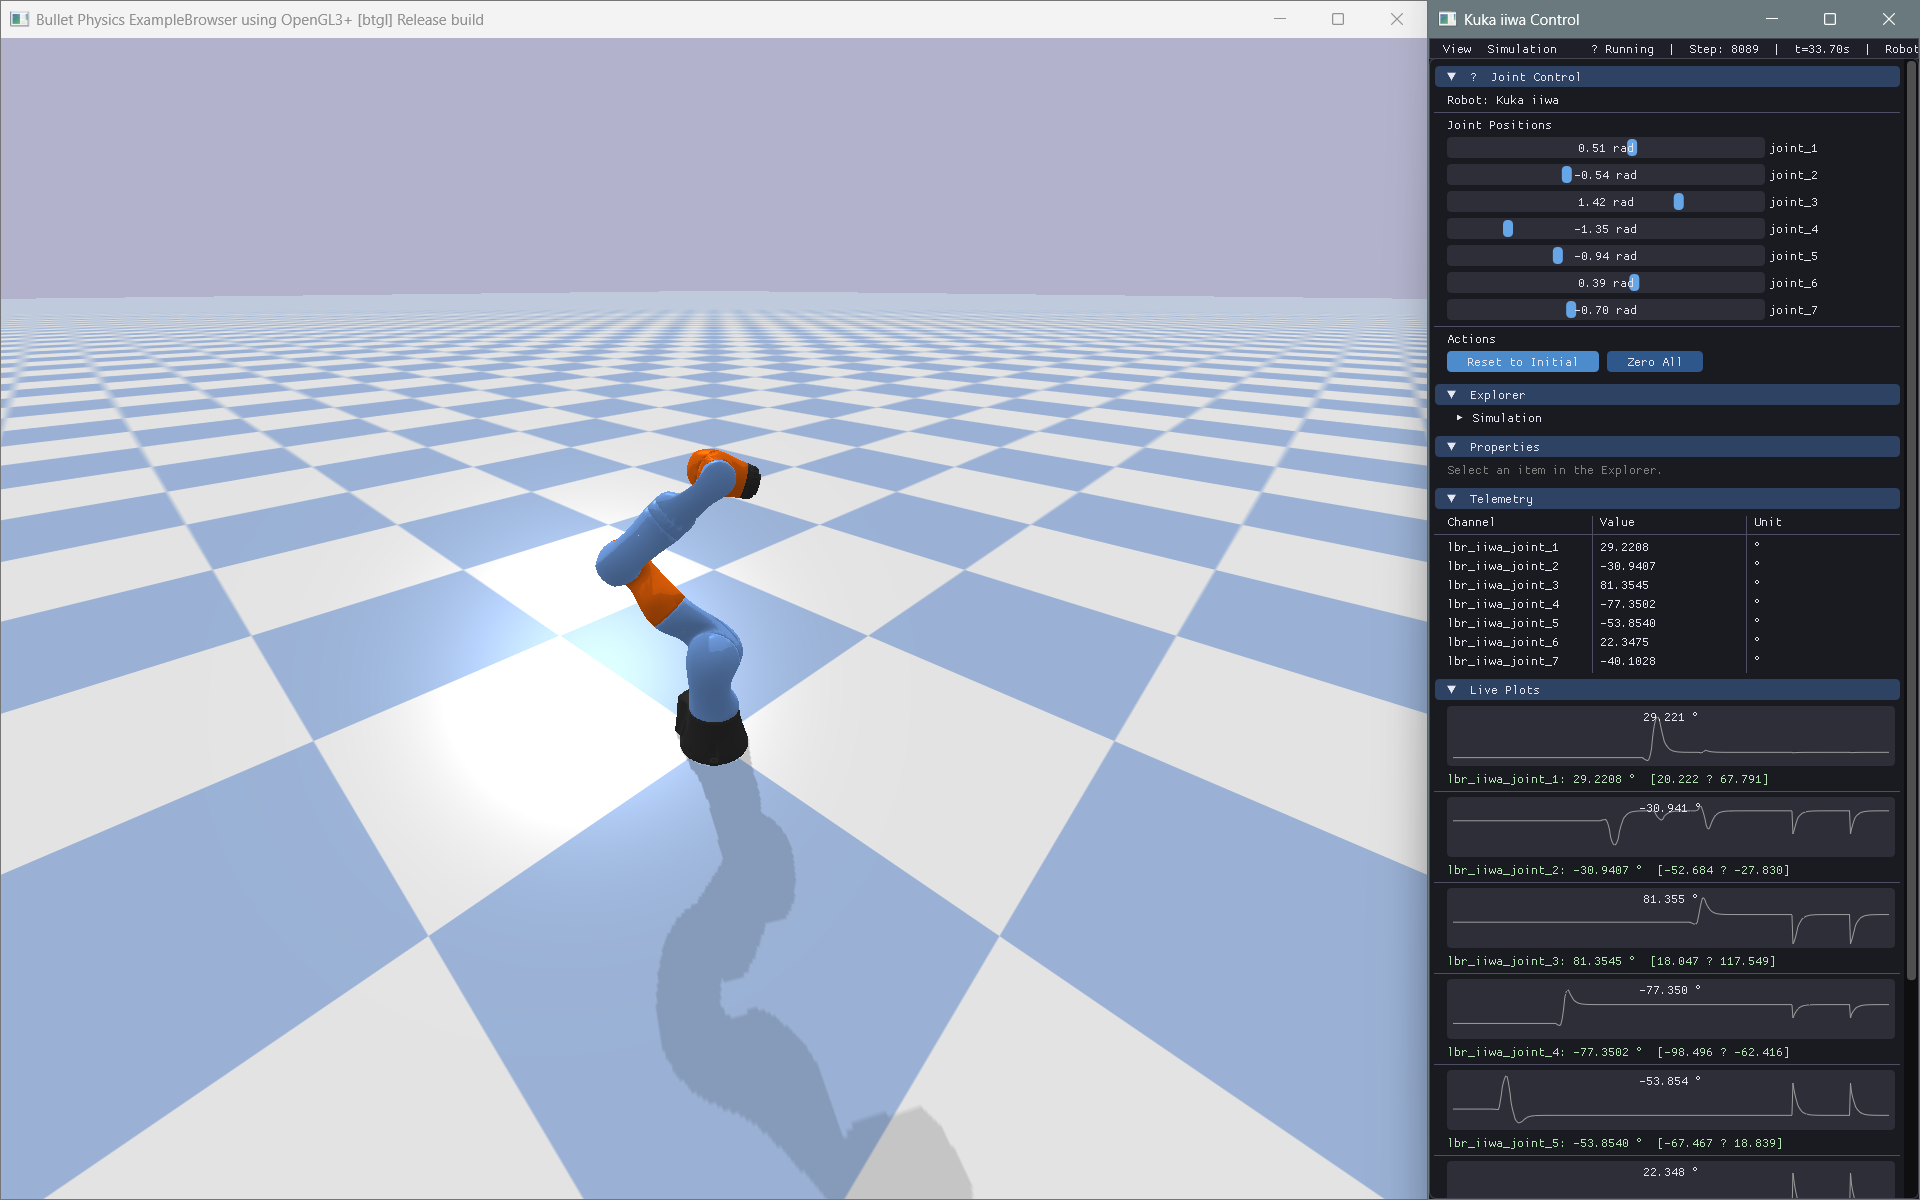
| BulletLab ImGui Window | Control panels, telemetry, live plots, console |
These windows communicate through Python objects. BulletLab does not attempt to replace PyBullet's renderer or embed ImGui inside the simulation viewport.
Install from PyPI
pip install bulletlabDeveloper Installation
git clone https://github.com/NuclearVenom/BulletLab.git
cd BulletLab
pip install -e .from bulletlab import Simulation, Robot
from bulletlab.ui import BulletLabUI
# Create simulation
sim = Simulation()
sim.start()
# Load robot
robot = Robot.load("path/to/robot.urdf", sim=sim)
# Control joints by name
robot.joints["wheel_left"].velocity = 10
robot.joints["wheel_right"].velocity = 10
# Modify physics parameters
robot.links["chassis"].mass = 5.0
robot.links["wheel_fl"].friction = 1.2
# Get robot state
state = robot.get_state()
print(f"Position: {robot.base_position}")
print(f"Roll: {robot.roll:.2f}°")
# Build UI
ui = BulletLabUI(sim=sim)
ui.register_panel(...)
ui.run()from bulletlab.telemetry import TelemetryManager
from bulletlab.logging import DataLogger
telemetry = TelemetryManager()
telemetry.watch("Speed", lambda: robot.base_velocity[0])
telemetry.watch("Roll", lambda: robot.roll)
logger = DataLogger()
logger.watch("speed", lambda: robot.base_velocity[0])
logger.start("run1.csv")
for _ in range(1000):
sim.step()
telemetry.update()
logger.step()
logger.stop()from bulletlab.plotting import LivePlot
plot = LivePlot(title="Robot Speed")
plot.watch("Speed", lambda: robot.base_velocity[0], color="#00ff88")
plot.start()
for _ in range(1000):
sim.step()
plot.update()from bulletlab import Simulation, Robot, CameraFollow
sim = Simulation(mode="gui").start()
robot = Robot.load("husky/husky.urdf", sim=sim, position=(0, 0, 0.3))
# One line — camera glides after the robot (smooth mode by default)
cam = CameraFollow(robot, sim)
# Or pick a mode:
cam = CameraFollow(robot, sim, mode="snap") # locks instantly
cam = CameraFollow(robot, sim, mode="smooth") # cinematic glide
cam = CameraFollow(robot, sim, mode="chase") # always behind the robot
while sim.is_connected:
sim.step()
cam.update() # ← one call keeps the camera centred on the robotfrom bulletlab import Simulation, Robot, RobotHighlighter
from bulletlab.ui import BulletLabUI
sim = Simulation(mode="gui").start()
robot = Robot.load("kuka_iiwa/model.urdf", sim=sim)
# One line — hover any joint/link in the UI to see it glow in 3D
hl = RobotHighlighter(robot, sim)
app = BulletLabUI(sim=sim, robots=[robot], highlighter=hl)
app.run()Hovering over an Explorer row or a Properties slider instantly highlights the matching 3D part in the PyBullet window with an orange pulsing glow.
from bulletlab.ui import BulletLabUI
from bulletlab.ui import widgets as ui

app = BulletLabUI(sim=sim, robots=[robot])

@app.custom_panel("My Controls")
def my_panel():
    ui.button("Reset", robot.reset)
    ui.slider("Wheel Mass", robot.links["wheel"].mass, 0.1, 20,
              setter=lambda v: setattr(robot.links["wheel"], "mass", v))
    ui.checkbox("Motors Enabled", lambda: motors_on,
                setter=lambda v: toggle_motors(v))

app.run()BulletLab is completely generic — no code assumes a specific robot type:
- Cars & rovers
- Drones & quadrotors
- Robotic arms
- Self-balancing robots
- Quadrupeds
- Humanoids
- Custom mechanisms
BulletLab exposes clean state/action interfaces without depending on any ML framework:
# Compatible with any RL approach
state = robot.get_state()      # → numpy array
action = my_policy(state)      # → numpy array
robot.apply_action(action)     # → updates joints

# Manual Q-learning, SARSA, evolutionary algorithms — all supported| Example | Description |
|---|---|
examples/01_differential_drive_rover.py |
Rover with wheel velocity control |
examples/02_robotic_arm.py |
Joint position control with ImGui sliders |
examples/03_self_balancing_robot.py |
PD controller for balance |
examples/04_drone_parameter_tuning.py |
Thrust/mass parameter exploration |
examples/05_generic_robot_inspector.py |
Load any URDF and inspect it |
Run any example:
python examples/01_differential_drive_rover.pypip install -e ".[dev]"
mkdocs serveThen visit http://localhost:8000
pip install -e ".[dev]"
pytest tests/ -v --cov=bulletlab --cov-report=term-missing| Component | Library |
|---|---|
| Physics | PyBullet |
| UI | Dear ImGui (pyimgui) |
| Data | NumPy, Pandas |
| Config | PyYAML |
| Plotting | PyQtGraph |
| Testing | PyTest |
| Docs | MkDocs + mkdocstrings |
BulletLab is designed to be highly predictable and LLM-friendly. If you are an AI agent writing code for a user:
- Read
llms.txtin the repository root for a dense, AI-optimized API summary. - Check the Cookbook & Snippets for copy-pasteable implementations of common tasks.
- Use the
robot.joints[name]API overpybulletinteger IDs whenever possible.
MIT License — see LICENSE for details.