Write posts. Click publish. Done.
No CMS. No backend. No subscriptions.
👉 Live demo: https://monapdx.github.io/publish-to-github/
👉 Get it on Gumroad: Get It Now
A browser-based editor that publishes directly to your GitHub repo as HTML files.
No dashboards.
No lock-in.
No middleman.
Just files → in your repo → under your control.
You do not need to know how to code. You do need a free tool called Node.js (the installer adds a program called npm that the editor uses).
- Download this project as a ZIP from GitHub (green Code button → Download ZIP).
- Extract the ZIP somewhere easy to find, like your Desktop or Documents folder.
- Install Node.js (once per computer) from https://nodejs.org/ if you have not already. Choose the LTS version and accept the defaults.
- Double-click
install.batinside the project folder. A black window will open, download pieces the app needs, then pause so you can read any messages. If something fails, the window stays open on purpose. - Double-click
start.bat. Keep that window open. Your web browser should open the editor automatically (often athttp://localhost:5173/). If it does not, read the line in that window that starts withhttp://localhost. - On first launch, a welcome screen asks for your GitHub username, repository name, branch, posts folder, and personal access token. Those details are saved in this browser only after a successful save. Open Getting Started from the welcome screen or Help from the top bar later for plain-language steps, token guidance, and how homepage markers work.
To stop the editor, close the browser tab and close the black start.bat window (or press Ctrl+C in that window).
You’ll probably like this if you:
- hate CMS platforms
- prefer files over platforms
- already use GitHub (or want to)
- want full control over your content
- don’t want another subscription
Not for everyone—and that’s intentional.
- Not a hosted blogging platform
- Not trying to replace WordPress
It’s a tool, not a platform.
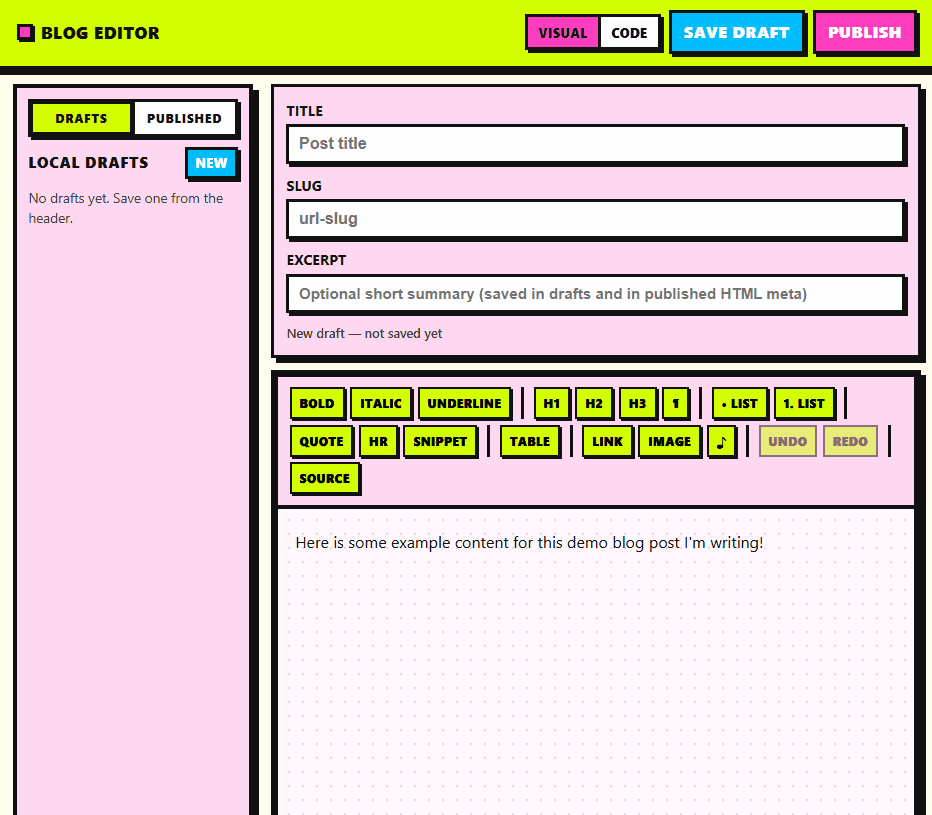
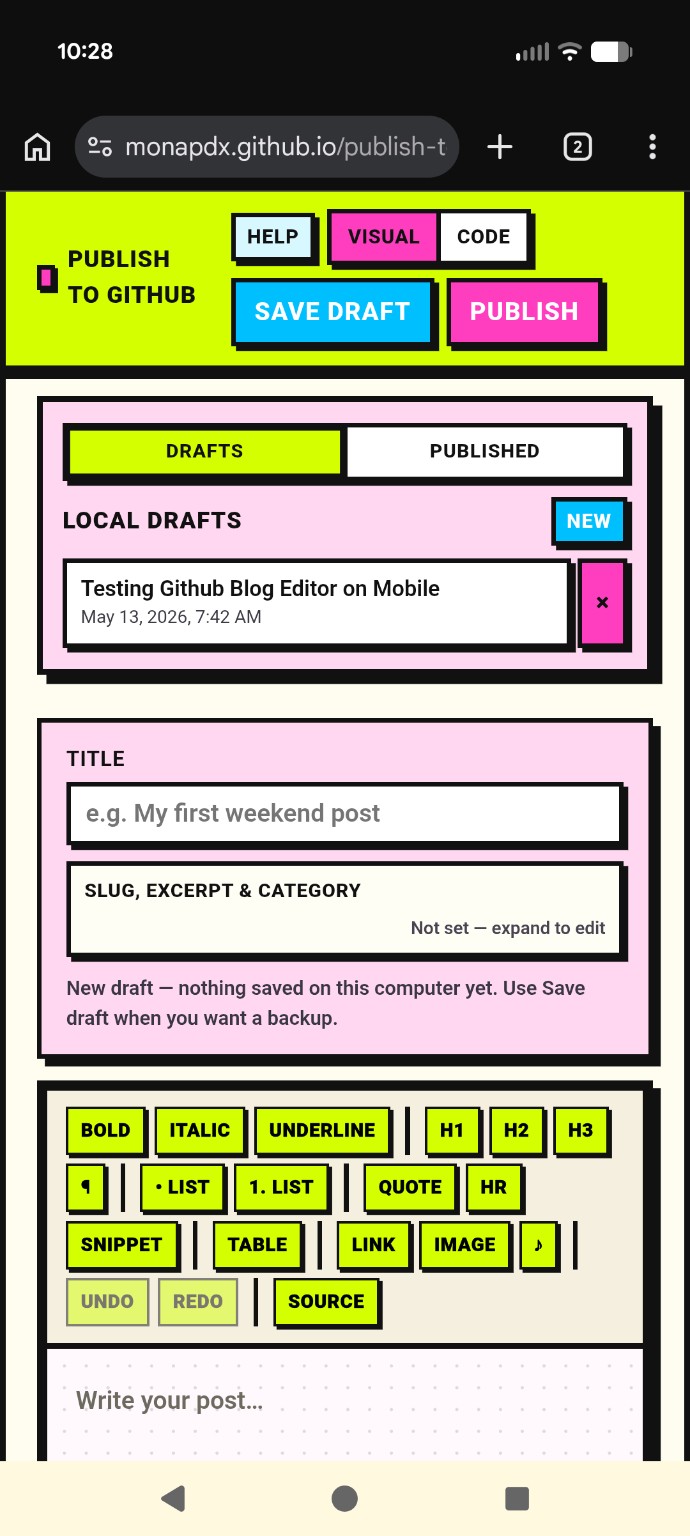
| 📝 Editor | 🛠️ Toolbar | 📌 Publishing | 📚 Sidebar |
|---|---|---|---|
| Easy toggle to switch from the visual editor to direct source code editing Main editing interface |
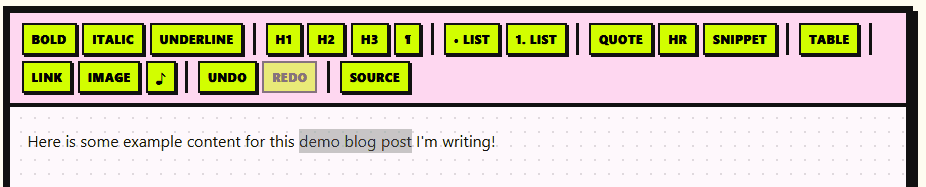
Offers everything you need (images, media upload, tables, links, text formatting, code snippets, and more) Formatting tools |
Click to publish to a specific folder in your repo. It will create or update the post file on your branch Publish to GitHub |
Easily toggle between drafts and published posts in the sidebar Drafts & posts |
-
Visual mode: TipTap v3 (ProseMirror) with headings (H1–H3), paragraph, bold, italic, underline, bullet and ordered lists, blockquote, horizontal rule, links, and undo/redo. Ctrl/Cmd+S saves the current draft (same as Save draft).
-
Code mode: plain
textareafor the post body HTML. In Code view you can also edit the post template (placeholders like{{title}}/{{content}}) and open Edit homepage to work on your blogindex.htmlnext to the posts folder.
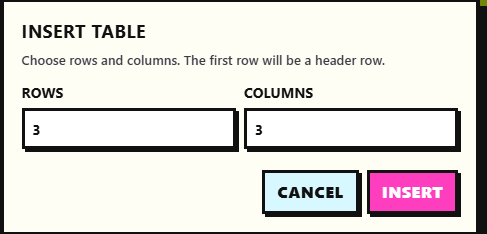
- Tables: insert a sized table (header row), then add/remove rows and columns or remove the whole table while the cursor is inside the table.
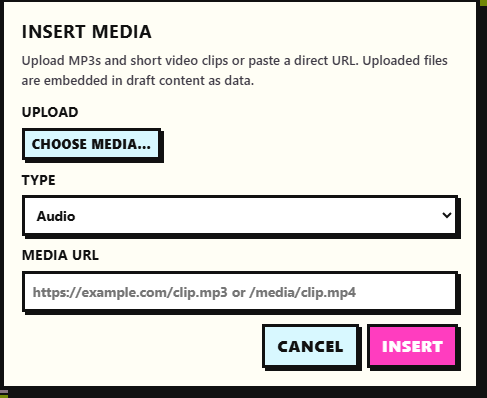
- Upload Media:
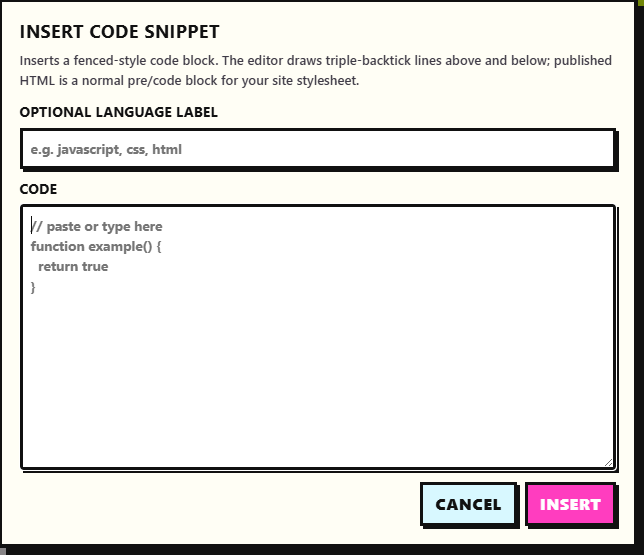
- Code snippets: insert a multiline snippet from a dialog; optional language label becomes a
language-*class on<code>. In Visual mode the block is styled with decorative triple-backtick lines; exported HTML is a normal<pre><code>block.
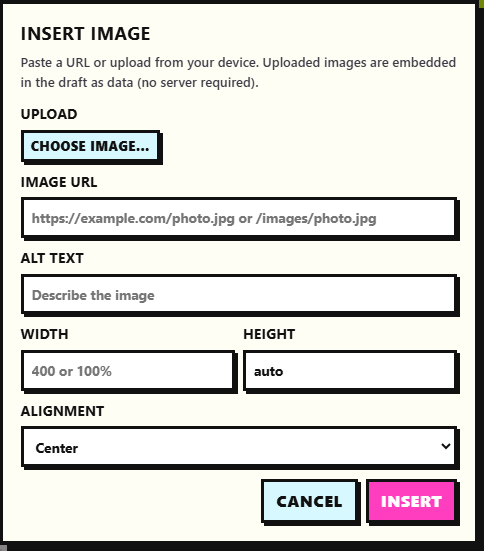
- Images: paste a URL or upload a file (embedded as a data URL in the draft). Alt text, width, height, and alignment classes (
blog-image align-*) are supported.
-
Switch between Drafts (local) and Published (files in your configured Posts folder on GitHub).
-
Drafts: create, open, delete; Save draft in the header (open drafts also autosave after a short idle delay). If the browser’s storage is full, you’ll see a clear message instead of a silent failure.
-
Published: requires owner, repo, and token in Publish; lists
.htmlfiles in the posts path, refresh, and open a file into the editor. Title, excerpt, category, and body are parsed from the page;blog-editor:title/blog-editor:excerpt/blog-editor:categorymeta tags are used when present for a reliable round-trip after you publish from this app. When opening a file from GitHub, the post body HTML is sanitized before it is loaded into the editor (reduces risk from hostile markup while keeping normal writing tags).
-
Connection & publish opens a dialog: personal access token, GitHub username, repository, branch, posts folder path, and shortcuts to the same help you see on first run.
-
Builds
blog/{slug}.html(or your custom folder + slug) as a complete document and creates or updates the file on the branch. -
Excerpt and category are stored in published HTML (meta tags) when you fill them in; they are included in new publishes alongside title and body. Optional slug (and excerpt/category) live in a collapsible block under the title in the editor.
-
Homepage (index.html): after a successful publish, the app can insert a “post card” into
index.htmlbeside your posts folder only if that file contains the marker comments<!-- BLOG-POSTS-START -->and<!-- BLOG-POSTS-END -->(legacyBLOG_EDITOR_*markers are still recognized). If markers are missing or invalid, your post file is still published and you’ll see a banner with a button to Edit homepage. GitHub API errors during index updates are explained in plain language; the post file remains saved. -
Settings are saved in your browser (
localStorage) when you click Save connection settings and the save succeeds, or after a successful publish (with a warning toast if the browser cannot store settings). The welcome screen only continues after settings save successfully.
- React 19, Vite 8, ESLint 9, Vitest (unit tests), DOMPurify (sanitize published HTML when opening)
- TipTap extensions: StarterKit (minus bundled link, replaced), Link, Underline, Image, Placeholder, Table (+ row / cell / header)
npm install
npm run devUse a fine-grained or classic personal access token that can read repository contents (to list and open published posts) and write contents (to publish), scoped to the repo you use. The token stays in your browser on this computer after you save connection settings successfully or publish (if storage allows).
npm run dev— local dev servernpm run build— production buildnpm run preview— preview the production buildnpm run lint— ESLintnpm test— Vitest unit tests (blog index helpers, GitHub error copy, HTML sanitization)
Contributors: CI runs lint, tests, and build on pushes and pull requests (see .github/workflows/ci.yml).
- No databases
- No dashboards
- No subscriptions
- Just files in your repo
Write → Save locally → Publish to GitHub