You signed in with another tab or window. Reload to refresh your session.You signed out in another tab or window. Reload to refresh your session.You switched accounts on another tab or window. Reload to refresh your session.Dismiss alert
Go to File > Settings (Windows / Linux) or IntelliJ IDEA > Preferences (Mac)
Install the plugin from the IntelliJ plugin repository
Search or look for OneSky
Click Download & Install
Restart the IDE
Configuration
Go to File > Settings (Windows / Linux) or IntelliJ IDEA > Preferences (Mac)
Find OneSky settings (IntelliJ IDEA 13):
Under Project Settings, select OneSky
Find OneSky settings (IntelliJ IDEA 14 or above or Android Studio):
Under Other Settings, select OneSky
Enter the your OneSky API key and secret, these can be found on OneSky web admin
Click Refresh and select a project from the list
Select the module of your Android application
Click Apply or OK
Send Strings
Select OneSky from the main menu or context menu (right click any strings.xml)
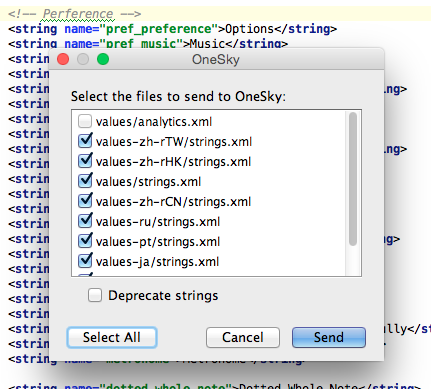
Click Send Strings...
Select the string resources to upload from the list
Optionally select Deprecate strings to deprecate the strings that cannot be found in the newly uploaded files with same filenames on server
Click Send
Sync Translations
Select OneSky from the main menu
Click Sync Translatioins...
Select the languages you want to sync with OneSky server
You can see the progress of each language
Optionally select Copy resources for deprecated locales support, the plugin will copy resources to support deprecated locales (e.g. copy Hebrew 'he' to 'iw'). For more information, please visit Android - Locale - Class Overview